With just a few simple ingredients, making your own Sourdough Starter is both rewarding and fun! This starter will elevate your homemade bread recipes, giving them that unique tangy flavor that only sourdough can provide. Perfect for any occasion, whether you’re baking for a special event or just enjoying fresh bread at home, your sourdough starter will be the star of the show. Let’s dive into this easy project!
Why You’ll Love This Recipe
- Easy to Make: With just flour and water, you can create your own starter in no time.
- Unique Flavor: Homemade sourdough starter brings a rich, complex taste to your baked goods.
- Versatile Use: Use it in a variety of recipes, from loaves to pancakes and even pizza dough!
- Cost-Effective: Save money by making your own instead of buying commercial starters.
- Creative Process: Enjoy the art of baking as you nurture and grow your very own starter.
Tools and Preparation
Before you get started, gather your tools. Having the right equipment makes the process smooth and enjoyable.
Essential Tools and Equipment
- glass jar (32 ounces)
- paper towel
- rubber band
Importance of Each Tool
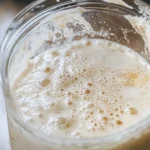
- Glass jar: A clear container allows you to easily monitor the bubbles and growth of your starter.
- Paper towel: This acts as a breathable cover, keeping out dust while allowing air circulation for fermentation.
- Rubber band: Use it to mark the level of your starter so you can track its rise over time.
Ingredients
Making your own Sourdough Starter is simple with just these few ingredients:
For the Sourdough Starter
- ½ cup flour (whole wheat or unbleached all-purpose)
- ¼-⅓ cup water (75°F is ideal)
How to Make Sourdough Starter
Step 1: Combine Flour and Water
In a clean glass jar, combine ½ cup flour with ¼-⅓ cup water. Stir until fully mixed. You want a thick but pourable consistency.
Step 2: Cover and Let Rest
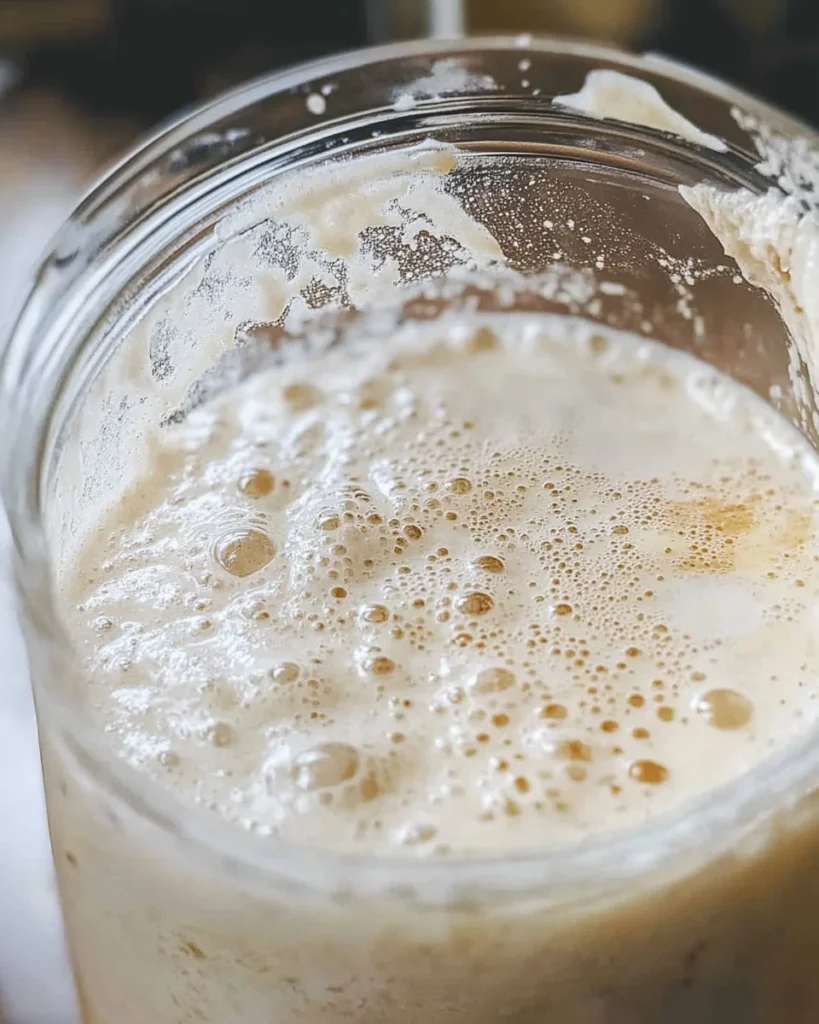
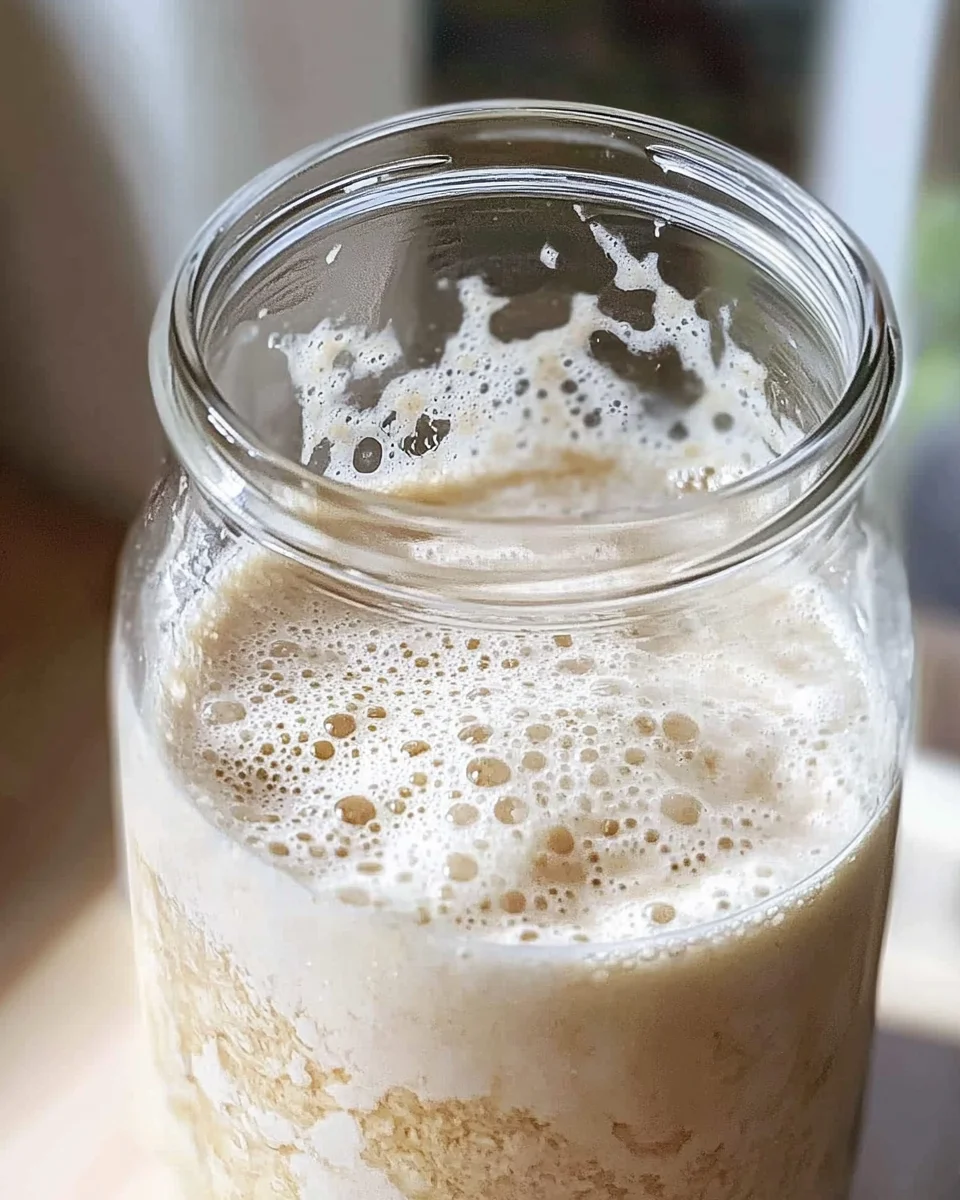
Cover the jar with a paper towel secured by a rubber band. This setup will keep out contaminants while allowing air in. Place it in a warm spot (around 75°F) for 24 hours.
Step 3: Feed Your Starter
After 24 hours, check for bubbles. If you see some, it’s time to feed it! Discard half of the mixture (about ½ cup), then add another ½ cup flour and ¼-⅓ cup water. Mix well again.
Step 4: Repeat Feeding Process
Continue feeding your sourdough starter every 24 hours. You should see more bubbles and growth each day. After about five days, it should be ready for baking!
Your homemade Sourdough Starter will soon become an essential part of your baking routine, providing delicious results every time!
How to Serve Sourdough Starter
A sourdough starter is a versatile ingredient that can elevate many dishes. Here are some ideas on how to serve and enjoy your homemade sourdough starter.
Use in Bread Recipes
- Classic Sourdough Bread: The most traditional use, yielding a tangy and crusty loaf.
- Focaccia: Add flavor and texture to this flatbread by incorporating your starter.
Pancakes and Waffles
- Sourdough Pancakes: Light and fluffy pancakes that have a delightful sour taste.
- Sourdough Waffles: Crispy on the outside and soft inside, perfect for breakfast or brunch.
Pizza Dough
- Homemade Sourdough Pizza: Create a deliciously chewy crust with your sourdough starter that enhances any topping you choose.
Batters for Baked Goods
- Muffins: Use your starter in muffin batter for added moisture and flavor.
- Quick Breads: Incorporate sourdough into recipes like banana bread for an extra depth of taste.
Soups and Stews
- Thickening Agent: A spoonful of sourdough starter can add richness to soups and stews, enhancing their flavors.
How to Perfect Sourdough Starter
Perfecting your sourdough starter takes time and care. Here are some tips to ensure you achieve the best results.
- Feed Regularly: Consistently feeding your starter helps it stay active. Aim for every 12-24 hours.
- Use the Right Temperature: Keeping your starter at about 75°F creates an ideal environment for fermentation.
- Monitor Consistency: A good starter should be thick but pourable. Adjust flour or water as needed.
- Observe Bubbles: Look for bubbles forming; this indicates that the fermentation process is working well.
Best Side Dishes for Sourdough Starter
Sourdough starter can complement various side dishes beautifully. Here are some great options to consider.
- Garlic Bread: Toasted sourdough slices topped with garlic butter make a perfect side.
- Bruschetta: Fresh tomatoes, basil, and olive oil on toasted sourdough create a refreshing appetizer.
- Stuffed Mushrooms: Fill mushroom caps with a mixture including your sourdough for a hearty bite.
- Cheesy Breadsticks: Stretch dough made from your starter for cheesy, garlicky breadsticks.
- Sourdough Croutons: Cube leftover bread, toss in oil, season, and bake for crunchy salad toppings.
- Savory Scones: Incorporate herbs and cheese into scone dough using your starter for a tasty treat.
Common Mistakes to Avoid
Starting your own sourdough starter can be rewarding, but there are some common pitfalls to be aware of. Here are mistakes to avoid for a successful starter.
- Using the wrong flour – Not all flours are created equal. Stick to whole wheat or unbleached all-purpose flour for better results.
- Not monitoring water temperature – Water that’s too hot or too cold can kill yeast. Aim for about 75°F for a healthy starter.
- Covering the jar too tightly – A tight seal can prevent air circulation. Use a paper towel secured with a rubber band to allow airflow while keeping out dust.
- Neglecting feeding schedule – Infrequent feedings can stall the growth of your starter. Feed it daily until it’s strong and bubbly.
- Not observing bubbles – If you don’t see bubbles after several days, your starter may need more time or different conditions. Be patient and make adjustments as needed.

Storage & Reheating Instructions
Refrigerator Storage
- Store your sourdough starter in the fridge if not using it daily.
- It can last up to two weeks without feeding in the refrigerator.
- Use an airtight container or a glass jar with a loose lid.
Freezing Sourdough Starter
- Freeze portions of your starter if you want to keep it longer.
- Use freezer-safe containers and label them with the date.
- Your starter can last up to three months in the freezer.
Reheating Sourdough Starter
- Oven – Preheat your oven to 200°F, then turn it off. Place the starter inside for warmth without cooking it.
- Microwave – Heat water in a bowl and place it next to your starter in the microwave, allowing gentle warmth through steam.
- Stovetop – Warm a pot on low heat and place your starter in it, ensuring it doesn’t get too hot.
Frequently Asked Questions
Here are some common questions about making and maintaining a sourdough starter.
What is a Sourdough Starter?
A sourdough starter is a mixture of flour and water that captures wild yeast from the environment. It serves as a natural leavening agent for bread.
How long does it take to make a Sourdough Starter?
It typically takes about 5-7 days of regular feedings for your sourdough starter to become active and bubbly.
Can I use tap water for my Sourdough Starter?
It’s best to use filtered or bottled water since chlorine in tap water may hinder yeast growth.
How do I know my Sourdough Starter is ready?
Your sourdough starter should double in size within 4-6 hours after feeding and have plenty of bubbles on the surface.
Final Thoughts
Making your own sourdough starter is an exciting journey into baking! This versatile recipe allows you to create delicious bread with unique flavors. Don’t hesitate to experiment with different flours or hydration levels for customization. Enjoy the process, and happy baking!
Sourdough Starter
Creating your own Sourdough Starter is a delightful journey into the world of baking that transforms simple ingredients into a bubbling, flavorful culture. With just flour and water, you can cultivate wild yeast that lends a unique tangy flavor to your homemade bread. This easy-to-follow guide will help you nurture your starter from scratch, ensuring it becomes a staple in your kitchen for delicious loaves and beyond. Whether you’re preparing for a special occasion or enjoying fresh bread at home, this starter is the perfect companion for all your baking adventures.
- Prep Time: 10 minutes
- Cook Time: N/A
- Total Time: 0 hours
- Yield: Approximately one active sourdough starter (enough for multiple baking sessions)
- Category: Baking
- Method: Culturing
- Cuisine: Various
Ingredients
- ½ cup whole wheat or unbleached all-purpose flour
- ¼-⅓ cup water (ideally at 75°F)
Instructions
- In a clean glass jar, mix together ½ cup of flour with ¼-⅓ cup of warm water until you achieve a thick yet pourable consistency.
- Cover the jar with a paper towel secured by a rubber band to allow airflow while keeping contaminants out.
- Place the jar in a warm spot (around 75°F) for 24 hours.
- After 24 hours, check for bubbles. If present, discard half of the mixture and feed it with another ½ cup of flour and ¼-⅓ cup of water. Mix well.
- Repeat the feeding process daily for about five days until bubbly and active.
Nutrition
- Serving Size: 1 tablespoon (15g)
- Calories: 55
- Sugar: 0g
- Sodium: 0mg
- Fat: 0g
- Saturated Fat: 0g
- Unsaturated Fat: 0g
- Trans Fat: 0g
- Carbohydrates: 12g
- Fiber: 1g
- Protein: 2g
- Cholesterol: 0mg