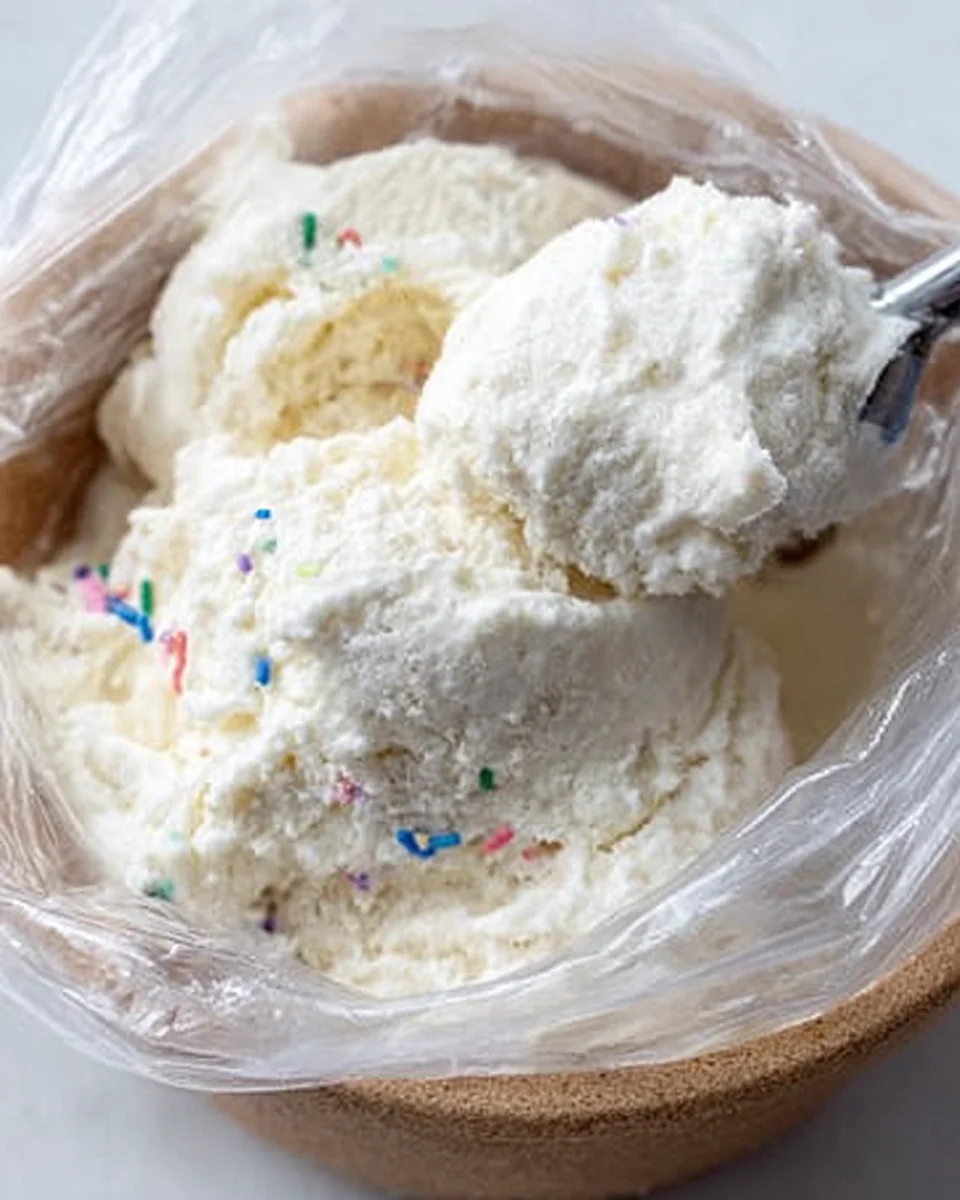
An easy and delightful way to enjoy a sweet treat is with Ice Cream in a Bag! This fun method allows you to create creamy, delicious homemade ice cream without the need for an ice cream machine. Perfect for family gatherings, summer parties, or a cozy night in, this recipe is both simple and satisfying. You can customize flavors and add mix-ins to suit your taste. Everyone will love shaking the bag and seeing their ice cream come to life!
Why You’ll Love This Recipe
- Quick and Easy: This recipe takes just 16 minutes from start to finish, making it perfect for last-minute desserts.
- No Special Equipment Needed: All you need are Ziploc bags, making this method accessible to everyone.
- Customizable Flavors: You can easily tweak ingredients or add your favorite toppings for a unique twist.
- Fun Activity: Shaking the bag is a great way to engage kids and make memories while creating a tasty treat.
- Minimal Cleanup: With just a couple of bags used, cleanup is a breeze after enjoying your delicious ice cream.
Tools and Preparation
Before you jump into making your ice cream, ensure you have all the necessary tools ready. This will streamline the process and make it even more enjoyable.
Essential Tools and Equipment
- Small Ziploc bag
- Large Ziploc bag
- Gloves
- Measuring cups and spoons
Importance of Each Tool
- Small Ziploc bag: This is where you mix your ice cream base; it must be sturdy enough to withstand shaking.
- Large Ziploc bag: Used for holding ice and salt, it creates the freezing environment needed for your ice cream.
- Gloves: These protect your hands from extreme cold while shaking the bags; they ensure safety during the fun!
Ingredients
An easy step-by-step tutorial to make homemade ice cream in a bag!
For the Ice Cream Base
- 1 cup half and half
- 1/2 tsp artificial or imitation vanilla extract
- 1 tbsp sugar
For Freezing
- ice
- 1/4 cup salt
For Packaging
- Ziploc bags (1 Small, 1 Large)
How to Make Ice Cream in a Bag
Step 1: Prepare the Ice Cream Base
- Pour 1 cup of half and half into a small Ziploc bag.
- Add 1/2 teaspoon of artificial vanilla extract.
- Sprinkle in 1 tablespoon of sugar.
- Seal the bag firmly, ensuring no excess air remains.
Step 2: Set Up the Freezing Bag
- Fill the larger Ziploc bag about halfway with ice.
- Add 1/4 cup of salt on top of the ice.
- Place your small bag filled with the ice cream mixture inside the larger bag.
- Pack extra ice around the small bag before sealing it tightly.
Step 3: Shake It Up!
- Put on gloves to protect your hands from cold temperatures caused by salt.
- Shake vigorously for about 6 minutes until the mixture thickens into ice cream.
Step 4: Rinse and Serve
- Carefully remove the small bag from the larger one.
- Rinse the outside of the small bag with cold water to remove any salt residue, especially above the seal area.
- Open the small bag carefully to avoid introducing any remaining salt into your ice cream.
- The texture might look icy initially; use a spoon to mix it around until it’s smooth. Scoop out portions and enjoy!
How to Serve Ice Cream in a Bag
Serving your homemade ice cream in a bag is a fun and creative experience. Here are some delightful ways to enjoy your treat!
Classic Sundae
- Toppings Galore: Add chocolate syrup, whipped cream, and a cherry on top for a classic sundae experience.
- Nuts and Sprinkles: Sprinkle chopped nuts or colorful sprinkles for added crunch and color.
Ice Cream Sandwiches
- Cookie Delight: Use two cookies to sandwich your ice cream for a delicious treat. Chocolate chip or oatmeal raisin work great!
- Waffle Cones: Scoop the ice cream into waffle cones for a fun, handheld dessert.
Milkshakes
- Blend It Up: Blend your ice cream with milk to create a creamy milkshake. Top with whipped cream for extra indulgence.
- Flavor Variations: Experiment with different flavors by adding fruits or chocolate pieces before blending.
Ice Cream Floats
- Refreshing Float: Pour soda over your ice cream in a glass for a fizzy twist. Root beer or cola pairs well with vanilla ice cream.
- Layered Treats: Layer different flavored ice creams with soda for a colorful float effect.
Fruit Cups
- Fresh Fruits: Serve your ice cream alongside fresh fruit like strawberries or bananas for a refreshing contrast.
- Fruit Compote: Spoon warm fruit compote over the ice cream for a warm and cold experience.
Party Platter
- DIY Ice Cream Bar: Set up an ice cream bar with various toppings and let guests customize their creations.
- Themed Parties: Choose toppings based on themes, like tropical fruits for summer or caramel and nuts for fall.
How to Perfect Ice Cream in a Bag
Making the best ice cream in a bag requires some attention to detail. Here are some tips to enhance your experience.
- choice of ingredients: Use high-quality half-and-half and pure vanilla extract for richer flavor.
- Thorough sealing: Ensure the small bag is sealed tightly to prevent any salt from getting inside while shaking.
- Shake it right: Shake vigorously for the full 6 minutes to ensure even freezing and texture.
- Rinse thoroughly: Rinse the small bag well after removing it from the larger one to eliminate salt residues.
- Mixing technique: Stir gently with a spoon once opened; this helps achieve creamy consistency rather than icy chunks.
- Serving temperature: Let the ice cream sit out for a minute before serving if it’s too hard; this allows it to soften slightly.
Best Side Dishes for Ice Cream in a Bag
Pairing side dishes with your homemade ice cream can elevate the dessert experience. Here are some delightful options:
- Brownies: Rich, chocolaty brownies complement the sweetness of the ice cream perfectly.
- Fruit Salad: A refreshing mix of seasonal fruits balances out the creamy texture of the ice cream.
- Pineapple Upside Down Cake: The warm cake adds warmth while contrasting beautifully with cold ice cream.
- Chocolate Chip Cookies: A classic pairing that never goes out of style; perfect for making sandwiches!
- Apple Pie: The spiciness of apple pie contrasts nicely with cool vanilla ice cream, creating harmony in flavors.
- Cheesecake Bites: These bite-sized treats provide richness that enhances any scoop of homemade ice cream.
- Granola Bars: Crunchy granola bars add texture and can be crumbled atop your ice cream for extra crunch.
- Mini Pancakes: Sweet mini pancakes topped with syrup make an unexpected yet delightful side dish!
Common Mistakes to Avoid
Making Ice Cream in a Bag can be simple, but there are some common mistakes that can ruin the fun. Here are a few you should avoid:
- Using the wrong size bag: If the small bag is too big, the mixture won’t freeze properly. Always use a small Ziploc for the ice cream base.
- Not sealing bags tightly: A loose seal can lead to salt or ice getting into your ice cream. Make sure to expel excess air and seal tightly.
- Skipping the shaking step: Shaking is crucial for mixing and freezing. Don’t skip this step; shake vigorously for at least 6 minutes.
- Adding too much salt: While salt helps lower the freezing point, too much can make your ice cream overly salty. Stick to 1/4 cup as per the recipe.
- Ignoring rinsing instructions: Rinsing the small bag after shaking is essential to remove any salt residue. This prevents your ice cream from tasting salty.

Storage & Reheating Instructions
Refrigerator Storage
- Store leftover ice cream in an airtight container.
- It will last up to 2 days in the refrigerator.
Freezing Ice Cream in a Bag
- If you want to keep it longer, place it in the freezer.
- It’s best enjoyed within 1 week for optimal freshness.
Reheating Ice Cream in a Bag
- Oven: Not recommended as it will melt completely.
- Microwave: Use short intervals on low power if needed; be careful not to melt it completely.
- Stovetop: Not suitable for reheating; just enjoy as is!
Frequently Asked Questions
Here are some common questions about making Ice Cream in a Bag.
How long does it take to make Ice Cream in a Bag?
It takes about 10 minutes of prep time and 6 minutes of shaking. In total, you’re looking at roughly 16 minutes.
Can I customize flavors for Ice Cream in a Bag?
Absolutely! You can add different extracts, fruits, or mix-ins like chocolate chips or nuts to create your favorite flavor.
What happens if my Ice Cream in a Bag doesn’t freeze?
If it’s not freezing well, ensure you have enough ice and salt in the larger bag. Also, check if both bags are sealed properly.
Can I use other types of milk for Ice Cream in a Bag?
Yes! You can substitute half and half with whole milk, almond milk, or coconut milk for different flavors and textures.
Final Thoughts
Making Ice Cream in a Bag is not only fun but also versatile. You can experiment with various flavors and toppings to craft your perfect treat. Whether it’s a hot summer day or a cozy evening at home, this recipe will satisfy your cravings and bring joy to anyone who tries it!
Ice Cream in a Bag
Ice Cream in a Bag is a fun and innovative way to create creamy, delicious homemade ice cream without any special equipment. In just 16 minutes, you can enjoy a delightful frozen treat that’s perfect for summer gatherings, birthday parties, or cozy nights at home. This recipe allows you to customize flavors and add your favorite mix-ins, making it a hit with both kids and adults alike. Everyone will love shaking the bags and watching their ice cream come to life! Plus, with minimal cleanup required, you can focus more on enjoying this sweet delight.
- Prep Time: 10 minutes
- Cook Time: 6 minutes
- Total Time: 16 minutes
- Yield: Serves 2 (approximately 1/2 cup per serving)
- Category: Dessert
- Method: No-Cook
- Cuisine: American
Ingredients
- 1 cup half and half
- 1/2 tsp artificial vanilla extract
- 1 tbsp sugar
- Ice
- 1/4 cup salt
- Small Ziploc bag
- Large Ziploc bag
Instructions
- In a small Ziploc bag, combine half and half, vanilla extract, and sugar. Seal tightly.
- Fill a large Ziploc bag halfway with ice and sprinkle salt on top. Place the small bag inside and fill with more ice before sealing.
- Wearing gloves, shake vigorously for about 6 minutes until the mixture thickens into ice cream.
- Remove the small bag from the larger one and rinse it to remove any salt before serving.
Nutrition
- Serving Size: 1/2 cup (120g)
- Calories: 180
- Sugar: 12g
- Sodium: 320mg
- Fat: 10g
- Saturated Fat: 6g
- Unsaturated Fat: 4g
- Trans Fat: 0g
- Carbohydrates: 16g
- Fiber: 0g
- Protein: 3g
- Cholesterol: 40mg